Namespaces- Organizing Components
Default Namespaces
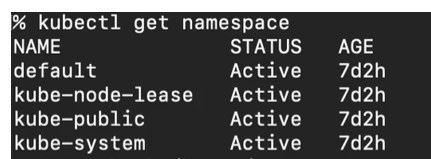
In K8s we organize resources in Namespaces. We can have multiple Namespaces in Cluster. We can think of a namespace as a virtual cluster inside of a Kubernetes cluster. when We create a cluster, by default Kubernetes gives us namespaces out-of-the-box.

Kube System namespace is not meant for Our use.
We shouldn’t create anything or shouldn’t modify anything in kube system namespace. The components that are deployed in a namespace are the system processes that are from the control plane, managing processes or kube CTL, et cetera.
Kube public contains is the publicly accessible data. It has a config map that contains cluster information which is Accessible even without authentication.
Kube-node-lease holds information about the heartbeats of nodes. So, each node basically gets its own object that contains the information about that note’s availability.
default namespace, and default namespace is the one that We’re going to be using to create the resources at the beginning, if We haven’t created a new namespace.
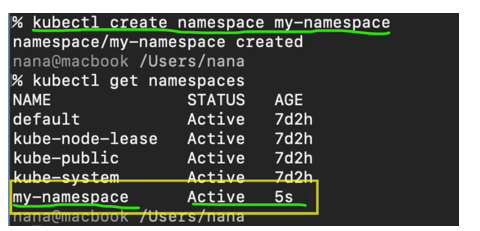
We can create new namespaces and the way that We can do it is using
Now another way to create namespaces is using a namespace configuration file
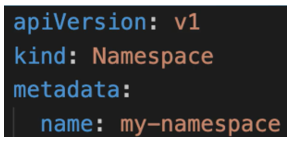
Why use Namespaces:
use case1:
If We use only the default namespace in Kubernetes, managing a complex application with multiple deployments, services, and config maps becomes difficult, especially with multiple users creating resources. Grouping resources into namespaces helps organize them logically. While Kubernetes recommends avoiding namespaces for small projects with up to 10 users, it’s still beneficial to use them, as even minimal setups often require additional resources like logging and monitoring, making the default namespace cluttered.
use case2:
Namespaces are essential when multiple teams share the same Kubernetes cluster. Without them, teams risk overwriting each other’s deployments if they use the same names. For example, if two teams deploy an application named “my-app deployment” with different configurations, one deployment could override the other, potentially without notice, especially in automated deployments. Using namespaces prevents such conflicts by isolating each team’s resources.
use case3
Namespaces are useful when hosting both staging and development environments in the same Kubernetes cluster. This allows shared resources, like a Nginx controller or an Elastic Stack for logging, to be deployed once and used by both environments. This avoids duplicating common resources across multiple clusters while keeping staging and development isolated.
use case4
Namespaces are useful for blue-green deployments, where two production versions run in the same cluster—one active and one as the next version. These versions exist in separate namespaces but can share common resources like a Nginx controller or an Elastic Stack. This setup avoids duplicating infrastructure while keeping the two production versions isolated.
use case5
Namespaces help limit resource usage and access when multiple teams share a Kubernetes cluster. Each team can be restricted to its own namespace, preventing accidental interference with other teams’ resources. Additionally, resource quotas can be set per namespace to ensure fair distribution of CPU, RAM, and storage, preventing one team from consuming excessive resources and affecting others. This creates a secure, isolated, and balanced environment.

Characteristics of Namespaces:
There are several Characteristics that We should consider before deciding how to group and how to use namespaces.
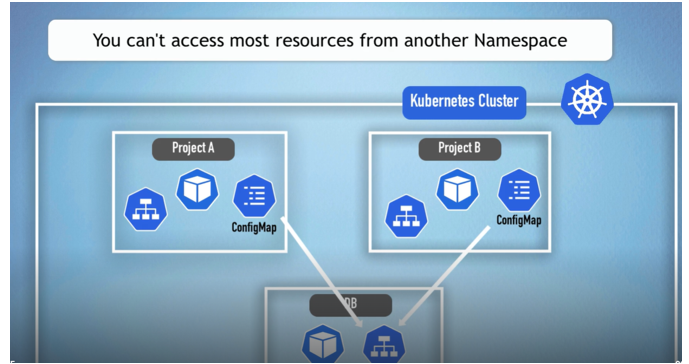
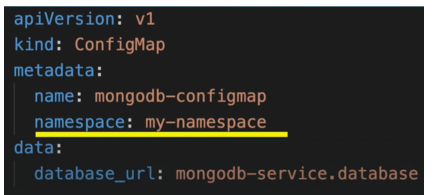
- Most resources in Kubernetes cannot be accessed across namespaces. For example, a ConfigMap or Secret in one namespace cannot be used in another; each namespace must define its own. However, services can be shared between namespaces. To reference a service from another namespace, the service URL must include the namespace name.

- Most Kubernetes resources are created within a namespace, but some exist globally in the cluster and cannot be assigned to a namespace. Examples include Persistent Volumes and Nodes, which are accessible across the entire cluster. We can list non-namespaced resources using:
kubectl api-resources –namespaced=false
To list namespaced resources, use:
kubectl api-resources –namespaced=true.
- By default, if We don’t provide a namespace to a component, it creates them in a default namespace.
- inside the configuration file itself fill namespace name
Change active namespace.
Kubernetes has an out-of-the-box Solution for this where We can use Kubectl to create and switch between namespaces.
after We execute this command, all the subsequent commands will use that context. they will execute in that namespace. But there is also, a tool called kubens I think is a little bit more convenient , Which We must install separately.
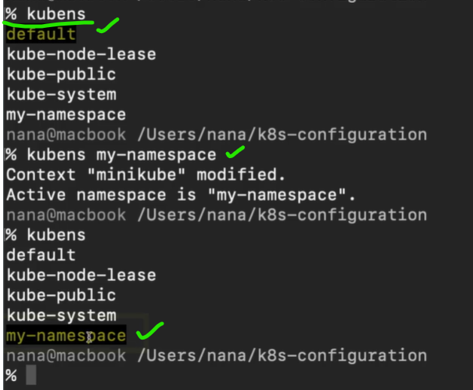
this will install kubens tool as well. So, once I have the kubens installed, I can just execute kubens command and this will give me a list of all the namespaces and highlight the one that is active which is default right now
So, now I can execute Kubectl commands without providing my-namespace. But obviously if We switch a lot between the namespaces.